
15 Essential Bike Maintenance Tips for Beginners: Keep Your Bike Running Like New
Whether you ride a bicycle, a motorcycle, or an electric bike, keeping it properly maintained is one of the smartest investments of your time. Regular upkeep extends the life of your bike, keeps you safer on the road, and prevents the kind of unexpected breakdowns that always happen at the worst possible moment.
The good news is that you do not need to be a trained mechanic. Most routine maintenance tasks are straightforward, require only basic tools, and take just a few minutes once you know what to look for. This beginner-friendly bike maintenance guide walks through 15 essential tips to help you stay on top of wear and tear, follow a realistic maintenance schedule, and avoid costly repairs from neglecting small problems.
Use this as your starting point, complete with a bike maintenance checklist, a maintenance schedule table, and practical advice for every step.
A Quick Bike Maintenance Checklist for Beginners
Use this checklist as your quick-reference guide before and between rides.
Before Every Ride
- Check tyres for pressure and visible damage
- Test brakes for responsiveness
- Inspect the chain for lubrication and tension
- Check that the lights are working
- Look for any fluid leaks
Weekly
- Clean the bike frame, wheels, and drivetrain
- Lubricate the chain
- Check battery charge level
- Tighten any loose bolts
Monthly
- Inspect brake pads for wear
- Check air filter (motorcycles)
- Inspect suspension for smooth operation
- Complete a full safety inspection
1. Follow a Regular Bike Maintenance Schedule
The foundation of any good bike maintenance routine is consistency. A structured schedule keeps small problems from becoming expensive repairs and helps you catch safety issues before they put you at risk.
| Frequency | Key Tasks |
| Before every ride | Tyres, brakes, chain, lights, leaks |
| Weekly | Clean, lubricate the chain, check the battery, and tighten the bolts |
| Monthly | Brake pads, air filter, suspension, full inspection |
| Every 3 to 6 months | Engine oil change, cable check, full drivetrain service |
| Annually | Professional service, brake fluid, and full mechanical inspection |
Always refer to your owner’s manual for the manufacturer-recommended servicing intervals specific to your bike model. Following the bike maintenance schedule outlined there protects your warranty and accounts for your bike’s unique engineering.
2. Perform the ABC Bike Check Before Every Ride
The ABC check is the simplest and most effective pre-ride routine a beginner can adopt. It takes less than two minutes and covers the three most critical safety systems on any bike.
A: Air Check tyre pressure before every ride. Under-inflated tyres affect handling, increase the risk of punctures, and wear faster. Over-inflated tyres reduce grip and make the ride unnecessarily harsh.
B: Brakes Squeeze both brake levers and ensure they engage firmly before the lever reaches the handlebars. Listen for squealing or grinding, and visually check the pads for wear.
C: Chain A quick visual and touch check of the chain ensures it is adequately lubricated and properly tensioned. A dry, rusty, or sagging chain is a warning sign that needs attention before you ride.
3. Check Your Tyre Pressure Regularly
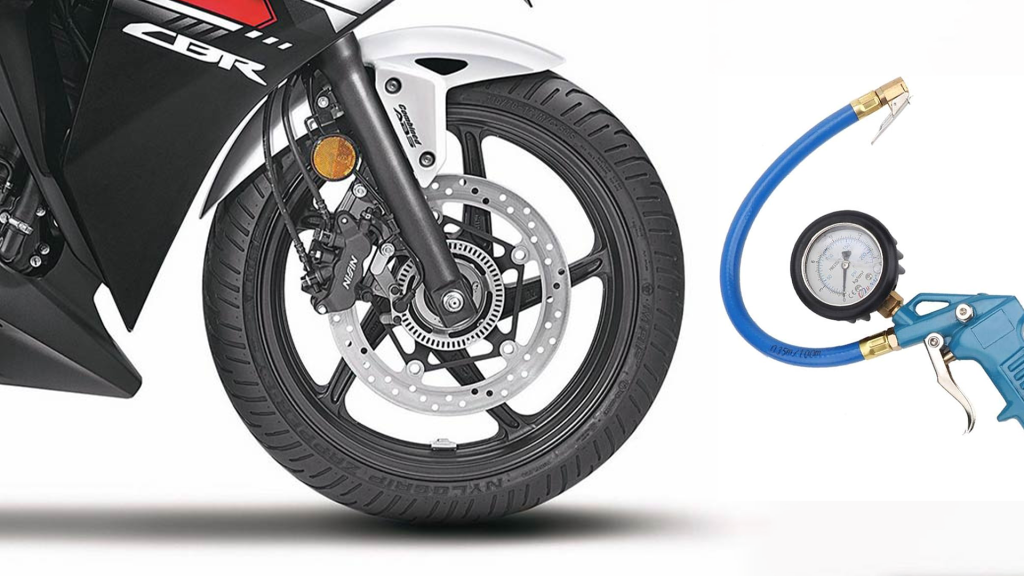
Tyre pressure is one of the most overlooked aspects of bike maintenance, yet it has one of the biggest impacts on safety, performance, and fuel efficiency.
Check the recommended pressure range printed on the tyre sidewall or in your owner’s manual. Most road bicycle tyres run between 80 and 130 PSI, while motorcycle tyres typically sit between 28 and 42 PSI, depending on model and load. Signs of underinflation include sluggish steering, a squirming feel through corners, and visible bulging at the contact patch.
Most bikes use either Schrader valves (same as car tyres) or Presta valves (common on road bicycles). Cold weather reduces pressure, so check more frequently during winter.
4. Inspect Your Tyres for Wear and Damage
A physical tyre inspection is an essential part of your bike maintenance checklist. Look for sidewall cracks indicating age-related degradation, cuts or embedded objects that may cause a slow puncture, and uneven wear patterns, which can indicate misalignment or incorrect pressure. Check tread depth; worn smooth tyres lose grip dramatically in wet conditions. Most bicycle tyres have wear indicator lines moulded into the rubber. When these disappear, replace the tyre.
5. Keep Your Bike Clean
A clean bike is easier to inspect, lasts longer, and is simply more pleasant to ride. Dirt and grime trap moisture against metal surfaces, accelerating corrosion across every component.
You need a soft brush or sponge, degreaser for the chain and sprockets, mild soap or bike-specific cleaning solution, and clean cloths for drying. Work from top to bottom: frame first, then wheels, then the drivetrain, including chain, chainrings, and sprockets. Finish by wiping down the brakes to ensure no soap or degreaser residue remains on the brake surfaces, as contamination significantly reduces stopping power. Avoid pressure washing directly onto bearings or headsets, as water intrusion quickly damages these components.
6. Clean and Lubricate the Chain
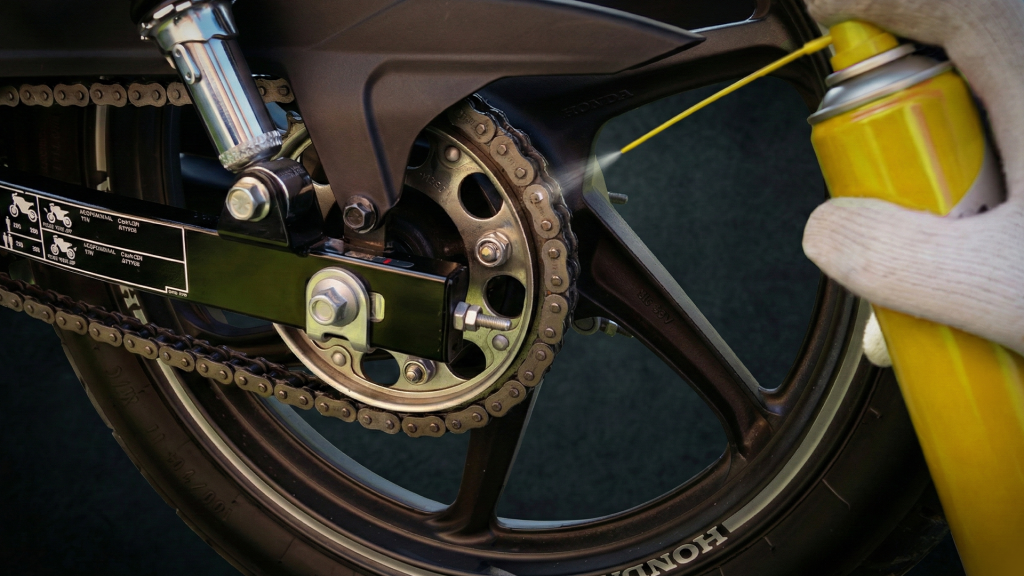
The chain is the hardest-working component on your bike and benefits most from regular attention. A clean, well-lubricated chain runs quietly, shifts smoothly, and lasts significantly longer than a neglected one.
Lubricate the chain every 150 to 200 kilometres for bicycles, or more frequently in wet or muddy conditions. Before lubricating, use a degreaser and rag to remove old lubricant and grime. Allow the chain to dry, then apply lubricant to each link while slowly pedalling backward. Wipe away excess from the outside of the chain to prevent it from attracting dirt.
Signs of chain wear include stiff links, visible rust, and stretch beyond acceptable limits, measured accurately with a chain wear indicator tool.
7. Check and Adjust Your Brakes
Inspect brake pads monthly for wear. Most pads have a wear line; when the pad material reaches that line, replace it immediately. Worn rim brake pads can expose the metal backing and damage your wheel rim; worn disc pads progressively reduce stopping power.
Squeeze each lever firmly. If it travels more than halfway to the handlebars before engaging, the brakes need adjustment. Listen for squealing, often a sign of glazed or contaminated pads, or grinding, which indicates metal-on-metal contact and requires immediate attention. Basic cable adjustments on rim brakes can be made with a barrel adjuster; disc brakes may need a workshop visit if bleeding is required.
8. Monitor Engine Oil and Air Filter (For Motorcycles)
For motorcycle riders, engine oil and air filter maintenance are non-negotiable parts of the bike maintenance guide.
Check engine oil level on level ground using the sight glass or dipstick. Oil should be clear amber to light brown; dark or milky oil means it is overdue for a change. Most motorcycles require an oil change every 3,000 to 5,000 kilometres, though synthetic oils often extend this interval.
The air filter prevents debris from entering the engine. A clogged filter restricts airflow and reduces power. Inspect every 5,000 kilometres and clean or replace per your manufacturer’s schedule.
9. Keep the Battery in Good Condition
Inspect terminals monthly for corrosion, which appears as a white or greenish powder. Clean with a small wire brush and apply terminal protector spray. Ensure connections are secure.
Avoid letting the battery run flat by charging regularly, especially if the bike sits unused for weeks. A trickle charger is a worthwhile investment for bikes stored over winter. Most batteries last three to five years; if yours is struggling to hold a charge, it likely needs replacing.
10. Tighten Loose Bolts and Perform an M-Check
Vibration naturally loosens bolts over time. The M-check is a structured way to inspect every major fastener by following the letter M from front to rear: handlebars and stem, front wheel and axle, headset, seat and seatpost, rear wheel, suspension linkage, and footpegs. Use the torque settings from your manual when tightening; overtightening can strip threads or crack components.
11. Learn How to Fix a Flat Tyre
Knowing how to fix a flat means a puncture does not end your ride.
To fix a flat on a bicycle: remove the wheel, deflate the tube fully, then use tyre levers to ease one side of the tyre off the rim. Remove the tube, briefly inflate it and pass it near your face to find the puncture. Mark the spot, dry it, and apply a patch according to the patch kit instructions. Check the inside of the tyre for the object that caused the puncture before refitting. Reinstall the tube, seat the tyre bead onto the rim, and inflate to the correct pressure.
For roadside emergencies, carry a spare tube rather than a patch kit; replacing a tube is faster when you need to get moving quickly.
12. Learn Basic Gear and Chain Adjustments
Gears that skip or refuse to shift indicate that adjustment or cleaning is overdue. Gear indexing is the calibration between your shifter and derailleur; if the chain does not sit cleanly on the intended sprocket, use the barrel adjuster on the derailleur or shifter to fine-tune cable tension, turning a quarter turn at a time. If the chain drops frequently, the derailleur limit screws may need adjustment, or the chain may be stretched and due for replacement. Keeping the chain clean and lubricated is the single most effective way to extend gear life.
13. Carry Essential Bike Maintenance Tools
A basic toolkit means you can handle most common problems on the road rather than waiting for roadside assistance.
| Tool | Purpose |
| Mini pump | Inflate tyres on the go |
| Multi-tool | Allen keys, screwdrivers, and a chain tool |
| Tyre levers | Remove the tyre from the rim |
| Spare tube or patch kit | Fix punctures |
| Allen keys | Adjust and tighten bolts |
| Portable chain lubricant | Emergency chain lube |
| Cable ties and tape | Temporary repairs |
Store these tools in a small saddle bag or top box so they are always with you.
14. Ride Responsibly to Reduce Wear and Tear
How you ride significantly impacts how quickly your bike wears. Accelerate gently from a stop rather than snapping the throttle. Brake progressively rather than grab the levers suddenly. Avoid potholes and road debris wherever safely possible, as impacts damage tyres, wheels, and suspension. Change gears at appropriate times rather than forcing a shift under heavy load. Do not overload the bike beyond its rated capacity, as excess weight disproportionately stresses the frame, suspension, and tyres.
15. Know When to Visit a Professional Mechanic
Even capable home mechanics should recognise when a job exceeds their skills. Searching for bike maintenance near me and booking a professional inspection at least once a year is sensible for any rider.
Seek professional help immediately if you notice unusual noises you cannot identify or resolve, brake failure or significant reduction in stopping power, oil or fluid leaks after the bike has been parked, electrical faults such as flickering lights or a non-starting engine, or persistent chain problems despite cleaning and adjustment.
Common Bike Maintenance Mistakes Beginners Should Avoid
- Ignoring the owner’s manual. Your manual is the most accurate source for your specific bike.
- Skipping tyre pressure checks. The fastest check available and the most consistently skipped.
- Over-lubricating the chain. Excess lubricant attracts grime, creating an abrasive paste. Apply lightly and wipe off excess.
- Delaying oil changes. Old oil loses its protective properties, accelerating engine wear.
- Using incorrect cleaning products. Harsh household chemicals can damage seals, paint, and rubber.
- Overtightening bolts. Use a torque wrench where precise tightening is required.
FAQs on Bike Maintenance
Most bikes benefit from a professional service every six to twelve months. High-mileage riders or those in demanding conditions should service more frequently.
ABC stands for Air, Brakes, and Chain: a quick pre-ride inspection of tyre pressure, brake performance, and chain condition that takes under two minutes.
Lubricate your bicycle chain every 150 to 200 kilometres, or after riding in wet or muddy conditions. For motorcycles, check your owner’s manual.
Yes. Routine tasks, including tyre pressure checks, cleaning, chain lubrication, and bolt tightening, are well within the ability of any beginner with basic tools.
At minimum: a pump, multi-tool, tyre levers, patch kit or spare tube, and chain lubricant.
Before every ride. Tyre pressure can drop noticeably overnight, particularly in cold weather.
Replace your bicycle chain when a chain wear indicator shows it has stretched by more than 0.75%. Delaying makes sprocket replacement necessary sooner and far more expensive.
Search online for local bike shops or motorcycle service centres with strong reviews. Many offer a free or low-cost inspection that is a good entry point for beginners.
Conclusion
Consistent, preventive maintenance is far less costly than emergency repairs caused by neglect. The fifteen tips in this guide cover everything you need to keep your bike running safely and efficiently, without needing specialist knowledge or expensive equipment.
Start by following the bike maintenance checklist before every ride, build the weekly and monthly habits into your routine, and refer to the bike maintenance schedule for longer-term upkeep. Combine your own DIY care with periodic professional servicing and you will extend the life of your bike while keeping costs predictable and your riding experience enjoyable.
